
I’ve been thinking a lot about flexures and compliant mechanisms over the past few days, and I found JPE – Precision Point. This wonderful resource about designing flexures and other precision engineering topics, all with a lovely graphic design.
I’ve been thinking a lot about flexures and compliant mechanisms over the past few days, and I found JPE – Precision Point. This wonderful resource about designing flexures and other precision engineering topics, all with a lovely graphic design.
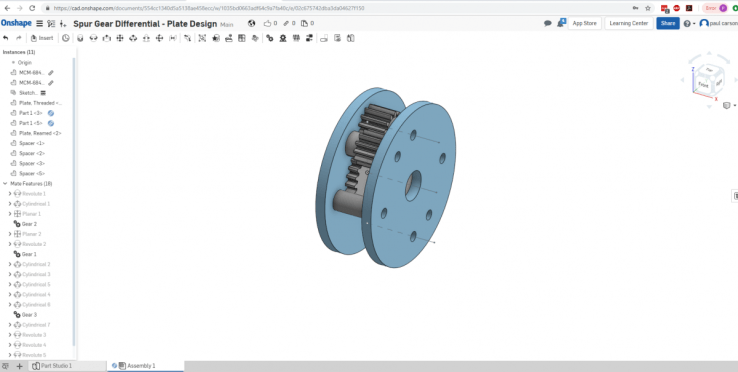
Last semester I designed these spur gear differentials and wrote a post about it on my work blog. I’m really proud of them, so I reposted it here.
Years ago when I was teaching framebuilding at Artisan’s Asylum, I made this video about how to set the frame jigs. Those jigs are still there. If you can stand this presentation, go for it!
I’ve also created CAD models for these jigs. (6 years later!) Find them here: https://a360.co/37kzngg
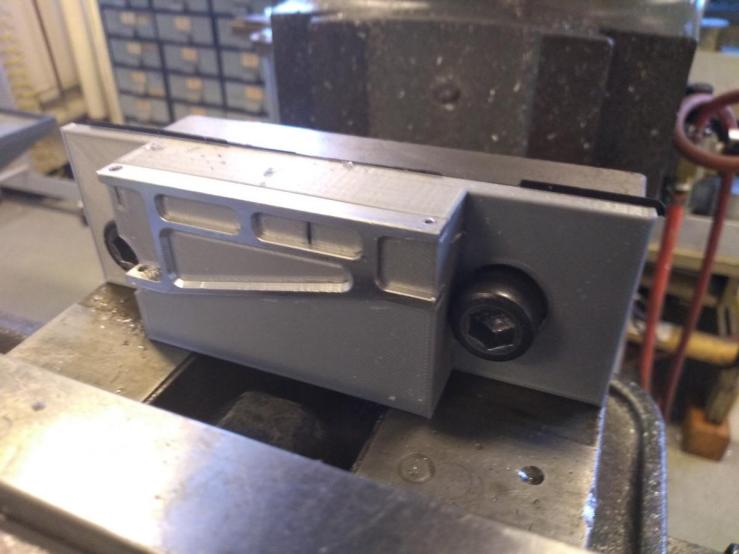
I wrote some instructions for work about 3d printing mill soft Jaws. If you have access to a 3d printer and a milling machine, it can be a nice solution.
Back in 2010 I bought the carcass of a CNC router from an older gentleman north of Scranton PA. At the time 3d CAD tools were prohibitively expensive, so I did a lot of 2d design and did a lot of backplotting with inplot.
It was a great way to get better at designing and building both machinery and stuff from plywood. I needed to learn how to type and read G-code, select tools, do feeds and speeds, not set the shop on fire, and lots of machine troubleshooting and design.
A few things I learned:
Thompson rails are expensive, but work great. Don’t cheap out and plan to drill the plain ones, because you’ll spend more in drills and carbide end mills than you would have to get the threaded ones.
Only drive one side of a gantry, and design that side to have a long distance between the bearings. Driving both sides of a gantry is a recipe for binding. If you avoid binding, it adds a lot of error as the gantry walks back and forth along the long axis.
Position your bridgeport so you can hang work off the table or out a garage door if you want to do a long series of holes at regular spacing. Drill jigs are crucial for series of holes at regular spacing.
If you are driving anything that creates a lot of dust or dirt, don’t place your gear racks so the teeth are facing up. They load up with crap and your drive pinion will skip teeth.
If you need to babysit long running CNC jobs, have something else productive to do, even if that’s cleaning your shop. It is a really bad idea to let a new job run for hours unattended, especially on a machine that creates flammable dust. I nearly set my shop on fire leaving to buy lunch. It was very foolish.
Finishing is super important. No one wants to interact with splintery wood or sharp parts. People expect things to be painted. Have a plan to finish your parts, or they will be perceived as amateurish.
This is another post from my bike business. I’m reposting here for posterity, and shows a local maximum I was at circa 2014. There are better ways to notch tubes for welding, but this was a nice, flexible, and relatively inexpensive way to do it.
When I built my first three frames, I used the best hole saws that I could find, the 6 tooth per inch lennox ones available at my local hardware. They were too coarse for thin walled 4130 and I ran into a lot of problems. Trying to improve on their performance, I switched to end mills, but I couldn’t get enough flutes to get around the edge of the tube catching and kinking in. I knew that abrasive notchers existed, but was far too much of a cheapskate to buy one, so I was off to look for an inexpensive lathe. After some looking, I settled on this one.
Early attempts to notch tubes in it were done with a poorly designed setup that hung off the tool post. It was easy to adjust, but there were tons of parts and the tubes were hard to change out. I did some measuring to make sure that my tube blocks would be on center and came up with the predecessor to the tool posts I use now. I sell a version of them here (this was a link to my old site. It doesn’t work anymore.)
To use it, clamp the tube in a tube block that measures 2” square. I make my own, but paragon sells them here, and they’re very reasonably priced. To keep the notches on either end in plane, always keep one of these blocks on your tube until it’s notched on both ends.
Then wrap the right size mandrel in sandpaper. Tape it on at the bottom of the sandpaper.
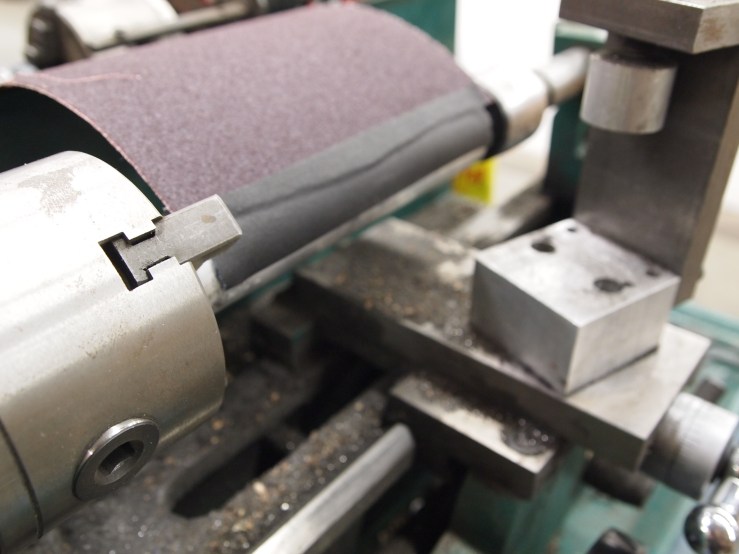
Then wrap the sandpaper on the mandrel. It’s important to wrap it in the same direction as the lathe turns. If it’s wrapped the opposite way, the tube unwraps the sandpaper.
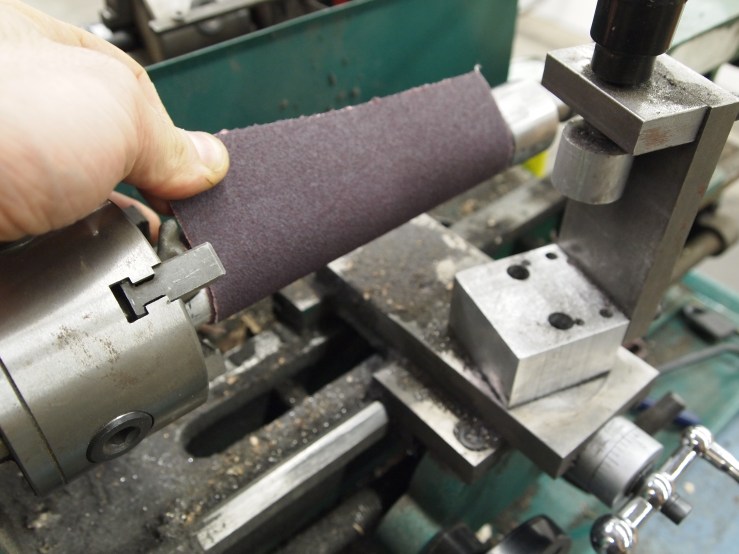
Keeping the wrap tight, tape it to itself with small strips of tape at either end. There’s no need to tape it to the mandrel, all these wraps do is keep it wound up on the drum.
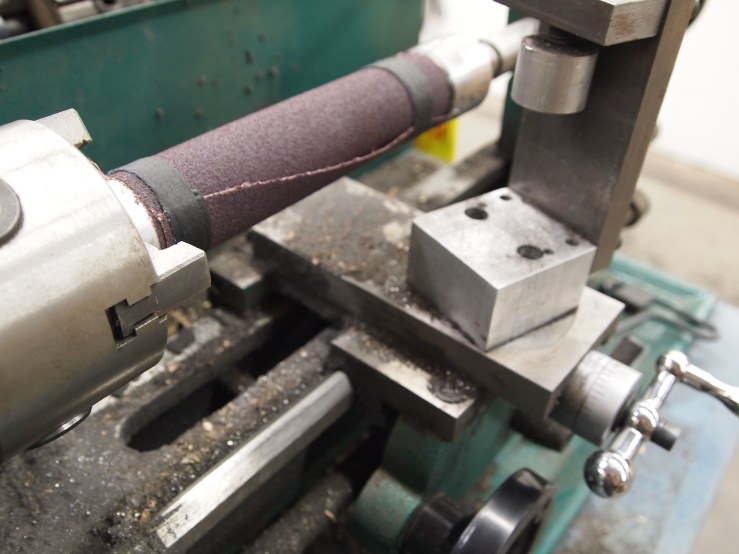
After the sandpaper is in place, spin up the lathe and gradually work the tube into it until a full notch is formed. Then deburr the end and check the fit. If the tube is too long, put it back in the lathe and take some more off.
I’ve been using this process for about a year and a half. It will slowly destroy your lathe, as there are loads of tiny abrasive particles that make it into your machine ways. This can cause chatter and slightly off center notching. With a little planning and lots of cleaning, it’s possible to make shields for the ways to prevent this damage.
Back in 2014 I made this post on my bike business website about building the Bowl of Death, a circular tiny velodrome at Artisan’s Asylum. Since I’ve closed that business and taken down the site, I’m reposting here for posterity.
December was cold, the shop was slow, and I had a problem to solve. I wanted to ride my bike inside, but not on rollers. I wanted to try riding on a track. I wanted to have some friends over and have a bike riding party.
During a long train ride from Boston to Philly for Christmas, I did some CAD work and drafted a 25 foot diameter circular velodrome. By the first week of January, I had ordered plywood and 2x4s. Then Sus and Piranha set to work, with some guidance from my friend Pete.
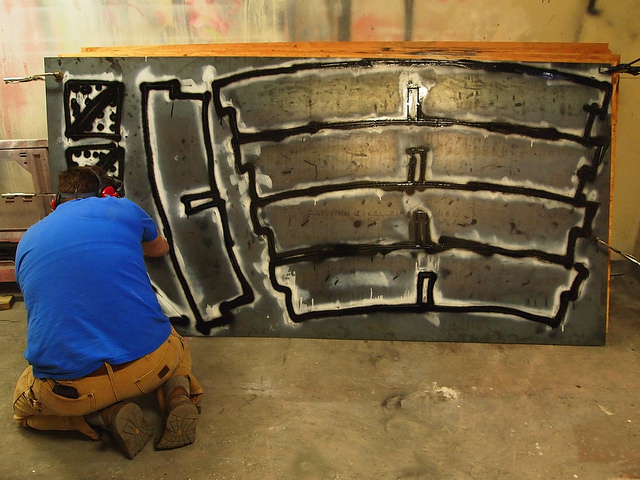
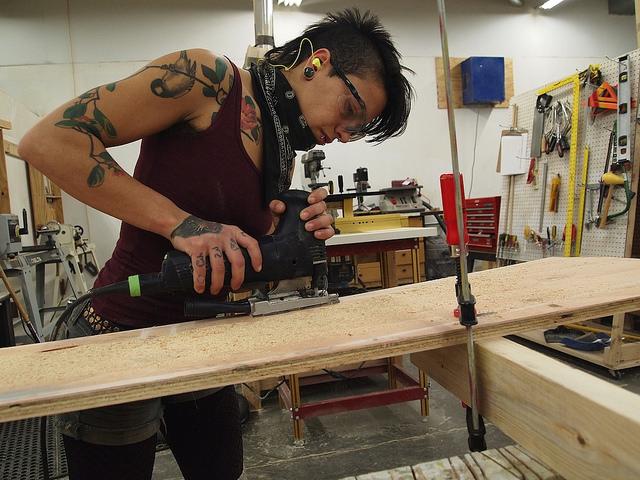
They spray painted the patterns for the ribs on to ¾” plywood with a sheet metal stencil I made, and jigsawed out all the shapes.
After that, things really started picking up speed. They started to assemble the sections – 14 in all.

And once we put them all in a circle, we skinned the faces with plywood. It didn’t take long before some bmx test runs happened.
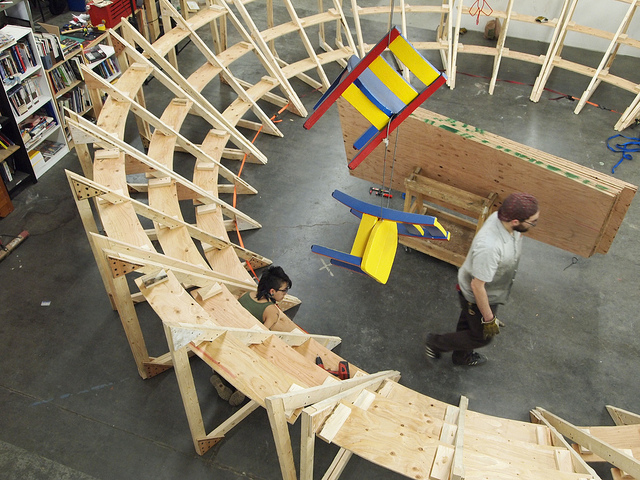
It turned out a little bigger than we thought, so now we have a 27 foot diameter circular velodrome. I’m calling it the bowl of death, because spectator faces are right at the top edge, and there’s no wall.
It’s a great test track and tons of fun to ride.
